
Removing the tint from your car’s windows can feel like a daunting task, especially if you’ve never tried it before.
Despite the perceived complexity, it’s an achievable task with the right tools and appropriate steps.
Often, car owners choose to outsource this task to professionals, not realizing that they can handle it themselves with a bit of guidance.
In some cases, the tint may start peeling or bubbling, which significantly reduces visibility, making it important to remove and replace.
Additionally, laws surrounding window tinting vary by region, and sometimes, removal becomes necessary to comply.
Let’s dive into the process and uncover the simplicity and feasibility of removing car window tint on your own.
Contents
- How To Remove Car Window Tint?
- Understanding the Importance of Removing Old Window Tint
- Step by Step Guide on Removing Car Window Tint
- How to Identify Signs Indicating a Need for Tint Removal
- Does Temperature Affect the Tint Removal Process?
- Utilizing Heat to Soften Window Tint Adhesive
- Tips on Peeling the Window Tint Film
- Key Tips to Remove Stubborn Adhesive Residue
- Necessary Tools for Successful Tint Removal
- How to Clean the Glass After Tint Removal
- Common Mistakes to Avoid When Removing Window Tint
- The Bottom Line
How To Remove Car Window Tint?
To remove car window tint, start by peeling off a corner of the tint film using a razor blade or a utility knife, then gently pull it away from the glass. If the tint film is stubborn, apply heat using a steamer or a hairdryer to soften the adhesive, easing the removal process. Once the film is removed, clean any remaining adhesive residue off the glass using a glass cleaner or soapy water.
In addition to detailing these basic steps, it’s crucial to delve into understandings of the potential hazards and complications that can arise during the removal process.
We will discuss such topics as how to avoid scratching the glass, the importance of removing all adhesive residue for safety and visual clarity, as well as guidance on how to handle particularly stubborn or aged window tint.
We’ll also provide insights on when it might be more sensible to engage a professional service for this task.
There’s a considerable amount of nuance to this seemingly straightforward task, making it necessary to gather as much information as possible before you begin.
Understanding the Importance of Removing Old Window Tint
Many car owners may not understand the importance of removing old window tint and may keep it on their vehicle windows far past its lifespan. Neglecting this maintenance process can result in a variety of problems which can, in turn, degrade the overall aesthetic and functionality of your vehicle.
One vital aspect about window tint is that it is not permanent. Over time, it can degrade due to prolonged exposure to the elements, car washing chemicals and the everyday wear and tear. This natural process leads to the tint losing its original color, clarity and the other associated benefits.
Old, degraded window tint can lead to a whole range of visual issues, making it harder for the driver to clearly see the road and their surroundings. It can create an annoying glare, drastically reduce visibility, and even cause distortions – all these contribute to driving discomfort and heightened safety risks.
Aesthetically, worn-out window tint can ruin the overall look of your car. It tends to turn purple or bubbly, creating a tacky appearance that can decrease your vehicle’s value. It gives an unkempt image, which is a significant issue if you are planning to sell your car.
The practicality of the window tint
Window tints serve many practical functions. They offer a level of privacy, drastically reduce heat buildup within the car, and help protect the interior from harmful UV rays. However, as they age these benefits decline greatly, making them practically useless.
“The practicality of window tints decline as they age.”
Decolorized and damaged tint can no longer effectively block UV rays, leading to the risk of the car’s interior being overexposed to sunlight. This can result in premature fading of the upholstery, amplifying wear and tear, and even the possibility of skin damage for the occupants.
Furthermore, old window tint that has started to degrade can no longer effectively manage heat. It can allow excessive sunshine into the car, compromising the vehicle’s air conditioning system’s efficiency and making it uncomfortable for the passengers.
Maintaining legality and visibility
In some regions, local traffic laws dictate specific requirements concerning window tinting. Old, deteriorating window tint could potentially violate these rules, leading to unnecessary run-ins with the law. Therefore, timely removal of old window tint not only maintains your vehicle’s appearance but also helps you abide by local traffic laws.
Keep up with technological advancements
Last but not least, outdated window tint should be replaced to keep up with the advancements in tints. Modern tints offer better UV protection, improved heat management, among other benefits. It would be beneficial to remove the old tint and apply a newer one to enjoy these features.
For practical tips and tricks on how to efficiently remove old window tints, the embedded video above is worth checking out. It offers visual and comprehensive instructions that can make the process a whole lot easier for DIY enthusiasts.
Step by Step Guide on Removing Car Window Tint
Removing old window tint from your car may seem like a daunting task, but it can be accomplished with the right tools, patience, and a step-by-step approach.
Prepare Your Tools and Workspace
To start, you will need to gather essential items such as a hair dryer, ammonia-based cleaner, razor blade, and some soapy water.
Ensure you are working in a well-ventilated area and secure all the necessary protective gears such as eye protection and gloves.
>Our emphasis is on safety first. Always be conscious of protecting your eyes and skin, particularly when using an ammonia-based cleaner.Ammonia is a powerful cleaning agent, but it can also be harmful if it comes in contact with your skin, eyes or if inhaled. Care should be taken to avoid this.
Starting the Window Tint Removal Process
Start the removal process by exposing a corner of the tint film using the razor blade. If the tint doesn’t peel off easily, you can use the hair dryer to generate heat, which will soften the adhesive.
Peel off the tint film slowly to prevent the film from breaking into smaller pieces, which may make the whole process more difficult.
>Understanding the correct technique is vital here. Slow and steady is the key to successfully removing the tint film in large pieces.Do note, however, that even with a keen and careful approach, there may still be moments where it breaks, in which case you’ll have to scrape off the remaining bits.
Dealing with Stubborn Adhesive
If the window tint leaves behind some stubborn adhesive, this can also be removed with an ammonia-based cleaner or an adhesive remover, which can be picked up at your local auto supply store.
Prioritize careful application to avoid damage to the window itself. Once the adhesive is loose, scrape it off using the razor blade, making sure to work in very small and methodical movements.
>Efficiency and patience go hand in hand especially when dealing with stubborn adhesive left behind by the tint film.Ensuring that you’re patient and meticulous goes an incredibly long way in achieving the best results.
Cleaning the Glass
After all the tint film and adhesive have been successfully removed, the final step is cleaning the glass.
Use soapy water to clean the window initially. Then finish off with a window cleaner to polish the glass to a shine.
This meticulous process will ensure your window is completely clear without any left over debris or stickiness from the adhesive.
In conclusion, removing window tint from your car may seem challenging, but with the right tools, patience, and process it can be done effectively.
How to Identify Signs Indicating a Need for Tint Removal
One of the most crucial aspects of car maintenance is understanding when your window tint needs to be replaced. Regular check-ups can prevent additional damage, ensure visibility, and keep the general aesthetics of your vehicle looking fresh. But how can drivers interpret the signs that show your window tint isn’t in its best condition? We’re going to answer that question in detail.
Discoloration
The first telltale sign your window tint needs replacing is discoloration. Over time, prolonged exposure to sunlight can turn the sleek, dark hue of your window tints into a hazy, purple tint.
Consider this an explicit signal that your tint is losing its effectiveness. Ignoring these signs can lead to adverse consequences such as increased glare while driving and reduced UV protection. It’s best to handle this issue promptly to maintain the quality and comfort of your ride.
Our eyes are not deceiving us when we notice that our formerly deep-black window tint has taken on a purple hue—it’s a clear indication that your tint requires attention.
The degradation in the color signals a drop in the quality and efficiency of the tint. As the color fades, the capabilities of the tint in providing necessary protection also decrease.
Bubbling and Peeling
Another clear signal that your window tint needs removing is the appearance of bubbles or peeling. A bubbling window tint is usually the result of poor installation, whereas peeling often occurs as the adhesive wears off over time.
These signs can be more than just an eyesore. It can greatly hamper visibility while driving, leading to possible safety risks. As soon as these signs become visible, it’s advisable to plan for a window tint removal for the sake of driving safety.
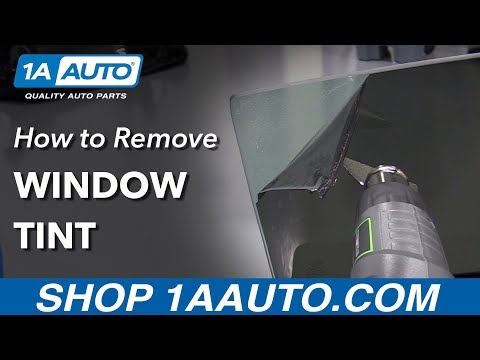
This video provides a detailed demonstration of how you can remove your deteriorating window tint effectively. It is a must-watch for anyone who wants practical knowledge and visual understanding on the entire tint removal process.
The Importance of Regular Examination
Regular inspection, although often ignored, is the best method to catch any signs of window tint deterioration. It allows you to catch early signs of discoloration, peeling, and bubbling before they turn into more severe and potential safety hazards.
When in doubt, it’s always a good idea to consult with a professional to understand whether your car tint requires removal. Remember, a fresh, good-looking window tint does not only enrich the aesthetics of your vehicle but also ensures a safe, comfortable driving experience.
“The importance of regular check-ups and early signs identification should never be underestimated.”
By making this a crucial part of your car maintenance routine, you can save yourself from the hassles of bigger problems in the long run. This preventative mindset can contribute to an all-around safer, more comfortable driving experience and a longer-lasting window tint.
Does Temperature Affect the Tint Removal Process?
Oftentimes, car owners and DIY enthusiasts who decide to remove their vehicle’s window tint, wonder if temperature plays a role in the entire process. The answer to this is quite simple, temperature does indeed influence tint removal and understanding this factor can make the task smoother.
Typically, warm temperatures tend to make the tint film more pliable and easier to peel off. In contrast, cold temperatures might make the film brittle and more challenging to remove. This tendency goes back to the basic principle of how heat can affect material properties, such as flexibility and stiffness.
The Impact of Hot Temperatures
The notably high temperatures can significantly aid in the tint removal process. When heat is applied to your tinted windows, it causes the tint film to loosen up, both from the glass surface and also makes the adhesive less sticky. This phenomenon makes it easier to peel off the tint in larger sections, reducing the time and effort required for the job.
The method of using heat could come from either a heat gun, a hairdryer, or simply covered parking in a sunny spot. The sun’s natural heat also works for this purpose. However, while helpful, caution must be observed when using extremely high temperatures as it could cause the glass to break if not handled keenly.
When using high temperatures, however, it’s crucial to concurrently utilize a tool to lift the film’s corners, preventing possible damage or unintended tearing of the film.
The noticeably high temperatures significantly aid in the tint removal process making the tint film to loosen up and leading to the straightforward removal of the film.
Consequently, this means that when planning to remove your car window tint, scheduling the task for a hot day would be a wise idea. It could alleviate the struggle associated with separating the film from the glass, especially if you are doing it yourself and seeking to cut costs on professional services.
The Effect of Cold Temperatures
On the other hand, cold temperatures can hinder the tint removal process.
The cold temperate, contrasted with hot, can cause the tint film to become brittle and harder to peel off. This brittleness increases the likelihood of the tint film tearing into numerous tiny pieces which are annoying and time-consuming to remove.
In cold temperatures, the tint film tends to become brittle, increasing the chances of disintegrating into tiny fragments, making the removal process more challenging.
Hence, during colder seasons or in typically cold regions, removing the window tint might require some extra time and patience. In such cases, still, using a heat source – hand-held or natural – can prove to be beneficial to counteract the cold’s adverse impacts. An important note to consider is ensuring the vehicle is sufficiently warmed up before attempting to lift the window tint.
In conclusion, temperature does significantly affect the tint removal process, and this is an aspect worth considering when attempting the said task. Knowing how to use the prevailing temperature conditions to your advantage could make the difference between a frustrating or successful DIY tint removal.
Utilizing Heat to Soften Window Tint Adhesive
The process of removing window tints from your car often involves the application of heat as a vital step. This is mainly because the tints are attached to the window using a form of adhesive that responds efficiently to heat.
Application of heat aids in softening the adhesive, making your task of removing the tint considerably easier. Hence, understanding how to utilize heat for this purpose is crucial.
Why Heat is Important
Window tint films are secured to the glass using a strong adhesive. This adhesive is designed to withstand various weather conditions, holding the tint film firmly in place.
However, over time as the tint starts to deteriorate, you would need to remove it for a host of reasons. Here comes the role of heat in loosening the bond between the adhesive and the glass.
Heat acts as an effective solvent in this regard, breaking down the adhesive and helping in easy removal of the tint.This method not only ensures that the tint comes off completely but also helps in preserving the quality of your window glass.
By gradually heating the window tint, the adhesive begins to weaken. Consequently, it becomes more amenable to peeling. By applying heat in a consistent and controlled manner, you can ensure that the window tint is removed efficiently and safely. It’s crucial to get this part right to ensure a smooth tint removal process.

Watching this video can provide more practical insights into how the heating process works. You might also learn about certain tips and hacks that professionals use to get the job done perfectly.
Methods of Applying Heat
There are various methods to apply heat when removing window tints. The most common method is using a hair dryer or a heat gun. The high-temperature setting on these devices can generate enough heat to soften the adhesive.
Heat should be applied evenly across the surface of the tint. The goal is to loosen the adhesive in all areas, making it easier to peel off the film without leaving any residue. Each area should be heated for at least 30 to 45 seconds, or until the adhesive underneath starts to soften.
An alternative method is to use the car’s defrost feature. If your car has a rear window defrost feature, you can turn it on and let the heat do the work. This method works best on cold days when the heat from the defrost feature can make a considerable difference.
The essential trick here is to not rush but rather patiently allow the heat to do its job.Applying heat for a longer duration ensures that the adhesive is fully softened and ready for removal. In haste, you risk damage to the window glass and leave behind adhesive patches that can be tougher to remove.
Remember, whether you use a hair dryer, a heat gun, or the car’s defrost feature, safety should always be your top priority. Avoid overheating and handle the equipment safely to prevent any accidents.
In conclusion, understanding how to effectively use heat to soften window tint adhesive is critical for successful tint removal. Good techniques combined with patience can make this task less of a chore and more of a successful DIY project.
Tips on Peeling the Window Tint Film
Scrapping off the window tint film is one of the phases in the tint removal process.
However, ensuring no residue is left on the window is often quite challenging.
Starting Point
Identifying a suitable starting point is the first step when peeling window tint film.
This should preferably be a corner of the window where the film is easiest to lift.
A utility knife can be used to gently pick the film without scratching the glass.
Having a proper starting point can mitigate the risk of tearing the film during the process.
In situations where starting from a corner proves to be difficult, you may opt to start from the middle.
However, there’s a higher risk of tearing the film if starting from the middle.
Having a proper starting point can mitigate the risk of tearing the film during the process.
This is why it’s advisable to start from a corner of the window, as it provides the least possibility of tearing.
With a good starting point, peeling the film becomes much easier and smoother.
Peeling the Film
Peeling the window tint film must be done slowly and gently.
Rushing through this process may result in tearing the film.
Tearing the film often makes the process more time-consuming and difficult to complete.
Thus, a slow and patient approach is always the best method when peeling off window tint film.
Peeling the window tint film must be done slowly and gently.
Practicing patience while peeling helps prevent the risk of leaving behind small pieces of film on the window.
It also protects your window from potential scratching or damaging during the peeling process.
Handling Stubborn Spots
Stubborn spots are those parts of the film that are difficult to peel off.
When encountered, it’s best to temporarily leave them and continue with the easily removable parts.
Returning to the stubborn spots later, after the rest of the film has been removed, often makes them easier to handle.
In some cases, you might need to apply more heat to soften the adhesive on those stubborn spots.
Returning to the stubborn spots later, after the rest of the film has been removed, often makes them easier to handle.
This further softening of adhesive simplifies the peeling process and helps to remove the stubborn spots completely.
Conclusion
Peeling off window tint film is a sensitive process that requires a lot of patience and attention.
Following the above tips diligently will not only make your work easier but also result in a neat and clean window after tint removal.
Remember, a slow, patient approach will always yield the best results when it comes to peeling window tint film.
Key Tips to Remove Stubborn Adhesive Residue
If you’re trying to **remove window tint** from your car, you might find that some stubborn adhesive residue is left behind. This can be a bit tricky to handle, but with patience and the right tools, it can be effectively removed.
One tried-and-true method to remove stubborn adhesive residue is the use of **isopropyl alcohol**. This substance can dissolve the adhesive, making it easier to wipe off. However, it’s important to handle this substance with care as it’s flammable and can be harmful if it comes into contact with your eyes or skin.
Another popular method is the **steam technique**, which involves using a steamer or an iron with a steam setting. The heat produced from the steam helps to soften the adhesive, which can then be scraped off with a plastic scraper or a razor blade. This method is particularly effective for stubborn residue but should be done carefully to avoid damaging the window glass.
You can also utilize **commercial adhesive removers** available in the market. They are designed specifically to dissolve various types of adhesives without causing damage to the surface they are applied on. Make sure you follow the manufacturer’s instructions to ensure safe and effective use.
Remember, removing adhesive residue can take time and patience. It’s crucial to apply slow and steady pressure and avoid the urge to rush to prevent damaging the glass.
While these methods are generally effective, they might not work for everyone or for every type of adhesive residue. In such cases, you might need to repeat the process or try a different method. It’s also a good idea to do a spot test first to see if the method you plan to use will not damage your window glass.
Also, remember to clean your glass thoroughly after removing the adhesive residue to ensure that there is no leftover residue or other debris. This will not only make your windows look cleaner but also ensure that they function as they should.
If you’re having trouble removing stubborn adhesive residue from your window tint, consider watching the following video. It provides clear instructions and tips to make the process easier.
httpv://www.youtube.com/watch?v=undefinedThis video offers a visual demonstration on how to remove the adhesive residue. It showcases techniques and tips that might prove to be more effective than reading written instructions.
In conclusion, **removing stubborn adhesive residue requires patience, the right tools, and techniques**. Whether you use isopropyl alcohol, the steam method, commercial adhesive removers, or a combination of these, remember to take your time and ensure the safety of your car windows.
Necessary Tools for Successful Tint Removal
To effectively remove car window tint, having the right tools is essential.
With these tools in hand, you will find the job easier, more efficient, and less risk of damaging your vehicle.
The Basic Tint Removal Kit
At the most basic level, you will require a standard tint removal kit.
This usually includes a razor blade scraper for peeling off the old tint and a plastic scraper for removing any lingering adhesive residue.
In addition, a spray bottle containing a soapy mixture is a must, as this is used to moisten the old tint and make it easier to remove.
This basic kit is often sufficient for less stubborn tints and those that are not too old.
The right tools can make the difference between an easy, painless process and a frustrating, potentially damaging one.
Having the correct tools, such as a razor blade scraper, helps to ensure that the window isn’t scratched or damaged during the removal process.
Similarly, a spray bottle with a soapy mixture aids in loosening the tint, preventing it from tearing and making the task more manageable.
Advanced Tools for More Stubborn Tints
In some cases, where the tint is particularly old or stubborn, more advanced tools may be necessary.
A heat gun or hair dryer can help to warm the tint and make the adhesive more tractable.
Additionally, a steamer can also be employed to similarly loosen the adhesive through the application of heat and steam.
Heat is a great ally in removing old, stubborn tints, and tools like heat guns and steamers can prove invaluable.
Using heat to soften the adhesive makes the tint much easier to remove and can help to prevent the film from tearing, which can make the job more challenging.
A steamer also minimises the risk of damaging the window further, as it requires less force to remove the film after the adhesive has been softened.
Cleaning Supplies
Once the tint has been successfully removed, you will need cleaning supplies to tidy up.
Goo Gone, or a similar adhesive remover, is excellent for removing any sticky residue left behind.
Coupled with a good microfiber cloth, it can leave the windows looking impeccable.
Lastly, a window cleaner helps get rid of any streaks for a perfect finish.
Cleaning up is an integral part of the process, and having the right supplies on hand will lead to immaculate, streak-free windows.
Using Goo Gone or a similar adhesive remover ensures that all the leftover sticky residue is removed, resulting in a clean, finished look.
A microfiber cloth aids in cleaning without leaving streaks or scratches, while a good window cleaner contributes to a flawless, clear finish.
Thus, having and using the right tools can significantly affect the success of your window tint removal process.
How to Clean the Glass After Tint Removal
Once you’ve accomplished removing the old window tint from your vehicle, the job isn’t quite complete. An equally important step is properly cleaning the glass once the tint is gone.
Residual adhesive, fragments of the tint film, and general dirt can stick to the glass, impeding visibility and making your car look neglected.
The Initial Clean-Up
The first step in effective cleaning involves removing large pieces of debris that may have been left behind after the tint removal.
You might find pieces of film clinging to the glass, especially towards the edges or corners. Use a utility knife or razor blade to carefully lift them, being careful not to scrape the glass itself.
Always put safety first while using sharp objects, wearing gloves to protect your fingers from accidental cuts.
Afterwards, as shown in this video tutorial, you might want to use an adhesive remover to tackle the sticky residue.

By watching it, you’ll learn practical techniques for removing adhesive residue without harming the glass. Carefully following these steps can yield satisfactory results.
Adhesive Remover or Rubbing Alcohol
Although there are many commercial adhesive removers on the market, rubbing alcohol is often equally effective and much cheaper.
Spray or pour a generous amount of rubbing alcohol onto the glass surface, then let it sit for at least ten minutes.
Allowing it time to break down the adhesive increases its effectiveness.
Patience is key when cleaning the glass after tint removal, as rushing the process may leave residue or streaks.
A sturdy plastic scraper can then be used to carefully scrape away the loosened adhesive.
Any remaining residue can be cleaned up with a cloth soaked in more rubbing alcohol.
Finishing Touches
The final cleaning step is to use a good quality glass cleaner and a microfiber cloth to make the glass perfectly clear again.
Clean both the interior and exterior of the glass, following the cleaner’s directions. This ensures a streak-free finish and maximum visibility.
In most cases, you will want to spray the cleaner on the cloth rather than directly onto the glass to prevent runoff and pooling.
It’s essential not to skip over corners or edges, areas where residue could still be hiding. Use the corner of the microfiber cloth or a clean toothbrush to access any difficult areas.
By following these steps, you can achieve clean, clear car windows after tint removal, enhancing both the aesthetics and safety of your vehicle. Remember, attention to detail can make the difference between glass that looks professionally done and a job that appears half-completed.
Common Mistakes to Avoid When Removing Window Tint
When it comes to car maintenance and upgrades, removing window tint is a task that often goes unnoticed, but can significantly impact the overall appearance and functionality of your vehicle. **Being aware of common mistakes involved in tint removal** can save you time and unnecessary costs.
Using Sharp Instruments
A common mistake is using sharp objects to scrape off the window tint. While it may seem like a quick fix, using sharp instruments can cause **irreparable scratches on the window glass**, making it look unattractive and potentially impairing visibility.
Therefore, it is crucial to use softer tools like a plastic scraper or credit card and start off gently to prevent any potential damage.
This practice not only safeguards your windows but also maintains the aesthetics of your car. Rather than resorting to quick and potentially damaging methods, one should adopt **patience and gentleness** when doing a task like window tint removal.
Not Testing a Small Area First
Another common mistake is diving right into the process without testing a small area first. **It’s important to start with a small section to test** if the removal process will effectively strip the tint without damaging the window.
Doing a test run makes it easier to adjust your technique or products before you set about removing the tint from larger, more visible areas.
It’ll save you from any unexpected disappointments or damage. Moreover, when you **test your process**, it also serves as a learning curve so that the actual process is more smooth and efficient.
Leaving Behind Adhesive Residue
The most frequently overlooked step in the tint removal process is not thoroughly removing the adhesive residue. The sticky residue left behind can not only obscure your vision but also attract dirt and dust.
A clean finish, devoid of any adhesive residue, should be the desired end result for an efficient window tint removal process.
Aim for thoroughness and patience and take the time to **remove all traces of the adhesive**. This obsession with details might seem tedious, but it’s crucial for maintaining the aesthetics of your car window.
Ignoring Safety Precautions
Last but not least, ignoring safety precautions is a fundamental mistake. When using products or equipment like a steamer or heat gun, **ensure you protect your hands and eyes**.
Despite seeming like an easy and straightforward task, window tint removal can cause some accidents if not treated with the necessary safeguards.
Consequences from small cuts to severe eye damage can occur, so it’s crucial to **practice safety measures**. Always wear protective gloves and goggles, and work in a well-ventilated area.
In conclusion, removing window tint might seem like a simple task, but in reality, it needs to be approached with thoughtfulness, patience, and careful attention to detail. **Avoiding these common mistakes** can make your task efficient, safe, and successful, enhancing your car’s appearance and value.
The Bottom Line
After delving into the pivotal issues surrounding car window tint removal, it is apparent that the process requires a considerable amount of skill and knowledge.
Understanding the importance of removing old tint, recognizing signs of necessary removal, and comprehending the influence of temperature can greatly enhance the outcomes of this task.
Moreover, strategic utilization of heat and learning about peeling the film correctly reduce the risk of leaving stubborn adhesive residue.
Armed with the necessary tools and the appropriate means to clean the glass afterward, individuals can successfully remove window tint.
However, one should always be mindful of common mistakes during the removal process to ensure optimal results.
Ultimately, with careful execution and attentiveness, window tint removal does not have to be an overly challenging task.