
Accidental scratches on a car can disrupt the aesthetic beauty of the vehicle and also lead to further damage if not treated promptly.
Many car owners face this common issue and wonder about the best approach to remedy the situation.
It is imperative to universally acknowledge that repairing car scratches need not always require professional help.
With the right tools and a little patience, one can easily perform this task at home, thereby saving a considerable amount of money.
In this in-depth blog post, we will delve into step-by-step methods of dealing with such scratches effectively.
The focus will be on cost-effective, simple strategies which can be implemented with relative ease.
Contents
- How To Fix A Scratch On A Car?
- Understanding Car Scratches: Types and Causes
- Step-by-Step Guide: How to Identify and Assess the Depth of Car Scratches
- Do You Really Need a Professional? Evaluating the Severity of Car Scratches
- Choosing the Right Tools: What Are the Essential Tools Needed to Fix a Scratch?
- Process of Cleaning the Scratch: Importance and How-To
- Understanding the Body Compound: Its Usage and Application Technique
- How to Blend the Scratch: Sanding the Body Compound for a Seamless Finish
- Why Waxing is Essential: Understanding Car Wax and Its Application
- What to Avoid: Common Mistakes While Repairing Car Scratches
- Maintaining Your Car’s Paintwork: Tips to Prevent Future Scratches
- The Bottom Line
How To Fix A Scratch On A Car?
To fix a scratch on a car, initially clean the area with soap and water, then dry it thoroughly. Apply a layer of body compound on the scratch and let it dry before gently sanding it down to blend it in with the surrounding paintwork. Finally, use a foam applicator to evenly apply a layer of car wax, following guidelines on wax’s packaging, on the treated area to seal the paint and protect it against further damage.
Moving forward, we will delve into key details about why certain processes are significant in repairing a car scratch.
It’s critical to understand the importance of each stage, from cleaning the surface to applying car wax.
Also, we will shed some light on how you can identify different types of scratches, as the treatment might slightly vary in each case.
We will even cover some professional tips and tricks for an enhanced finish, helping you make your car look as good as new.
Read on to further your knowledge on this subject matter, as well as learn about potential pitfalls to avoid and how to assess whether a scratch can be fixed DIY or needs professional intervention.
Understanding Car Scratches: Types and Causes
Car scratches can be very annoying, especially if you’re unsure of their origin. They can lower the visual appeal of your vehicle and can also cause a significant reduction in its value.
Types of Car Scratches
Typically, there are three types of scratches that can appear on your car. The first is a clear-coat scratch. This type of damage is the most common and it just affects the clear coat layer of the car’s paint.
The second type is a primer scratch. This one goes deeper, affecting the primer layer of the car’s body paint but not reaching the metal part of the car body.
The third category is a severe scratch, also known as a deep scratch. This type not only affects the color and clear coat, but even the metal part of the car’s body. These are usually the hardest to fix and often require a professional.
Causes of Car Scratches
Sometimes described as a car owner’s worst nightmare, scratches can be caused by a variety of factors. Common reasons for car scratches include minor collisions, improper washing techniques, road debris, vandalism, and random accidents.
It’s important to understand that environmental factors can also play a significant role, such as tree branches, bird droppings, rock chips, and even harsh weather conditions.
Whilst we can’t avoid every potential cause, understanding where the majority of scratches come from can certainly help us in terms of prevention.
Common reasons for car scratches include minor collisions, improper washing techniques, road debris, vandalism, and random accidents.
Greater awareness of these risk factors means you can take preventative measures, such as parking in a safe, well-lit area, using a protective car cover, or being more cautious while driving.
Also, sharp objects and certain cleaning tools can cause scratches. Therefore, it is essential to be careful while washing your car or moving objects across its surface.
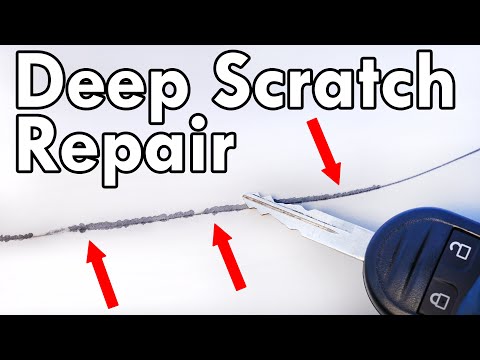
Should you be dealing with a particularly nasty deep scratch, this helpful resource provides detailed steps on how to tackle it. It offers practical, step-by-step guidance that can turn even a novice into a DIY car scratch repairer.
Step-by-Step Guide: How to Identify and Assess the Depth of Car Scratches
Looking at the Scratch
The first thing you need to do when assessing a car scratch is to carefully take a look at it.
It might sounds simple, but careful observation can provide a wealth of detail that can aid in the next steps of scratch repair.
Understanding the nature of the scratch is critical in determining the appropriate strategy for its repair.
This quote promotes the importance of the initial observation process. Without it, you may not be able to assess accurately and understand the nature of the scratch.
If seen in a proper light, the scratch may be showing signs of rust, or the paint near the scratch may be beginning to peel.
Feeling the Scratch
After visually inspecting the scratch, it’s time to feel it. Using your fingers, carefully run them over the scratch.
This technique will provide a sense of the depth and severity of the scratch.
By doing this, you will be able to identify if the scratch is just a surface scratch or it has penetrated deeper into the car’s body.
Feeling the scratch helps you because scratches that can be felt are typically those that have penetrated through the clear coat and into the color coat or primer.
When such deep scratches are felt, it indicates that they have gone beyond the surface. In such cases, simple DIY scratch repair techniques might not suffice and professional repair may be needed.
Using Scratch Assessment Tools
If you are still uncertain about the depth or severity of the scratch after feeling it, a scratch assessment tool such as a depth gauge can be used.
A depth gauge, also known as a paint thickness gauge, is a tool designed to measure the total thickness of the vehicle’s paint.
With this tool, you can determine how deep the scratch is and which of the vehicle’s paint layers has been affected by the scratch.
Using a scratch assessment tool adds precision to your evaluation, giving more clarity about the damage.
The additional data provided by these tools allow for a more precise understanding of the scratch’s severity, making it easier to decide upon the appropriate repair option.
Scratch Color Identification
This is another important step in determining the scratch’s depth. Look at the color of the scratch.
If the scratch exposes the metal underneath, it indicates that all the paint layers have been cut through.
If the scratch is colored or white, this means it has just damaged the clear coat or color coat but not gone as deep as the primer or metal.
The color of the scratch can give you a clue about the depth of the damage, and therefore, its severity.
Correctly identifying the color of the scratch can help guide you in choosing the right repair solution. For instance, a scratch that has exposed the metal will require a more intensive repair process than one that’s only affected the clear coat.
Do You Really Need a Professional? Evaluating the Severity of Car Scratches
If you come across a scratch on your car’s paintwork, the first thought might be to call a professional for repair. But, the severity of the scratch determines whether professional intervention is necessary or not.
A superficial scratch, which has only affected the top coat called the clear coat, can be easily repaired at home. Meanwhile, a deeper scratch that has pierced through to the primer or even to the metal will need more intricate repair, often involving professionals.
Evaluating the Severity
Identifying the severity of the scratch is the key to understanding whether a professional is required or not.
Light scratches that only mar the clear coat of your car’s paint job can be addressed with basic tools and a little bit of your time.
Start by running your fingernail across the scratch; if your nail doesn’t catch, then it’s likely a superficial scratch that can be taken care of at home.
An in-depth analysis of the scratch entails carefully feeling the depth and observing if it has exposed the primer or the metal underneath. This may indicate that it’s a deeper scratch, seeking professional help.
If it’s a scratch that has gone past the clear coat, going for a professional option might be beneficial.
This is because dealing with deeper scratches can involve tasks such as paint blending or even repainting, which require skills and tools beyond the scope of an average car owner.
At the same time, a more surface-level scratch may appear similar to a deep one, such as when a dark underlayer is revealed, giving the illusion of a deep scratch when it’s not.
In such cases, after properly cleaning the surface, a simple polishing could completely remove the scratch.
When to Call a Professional?
If the scratch has visibly penetrated deep into the paint layers, damaging the base coat or primer, then it’s a clear sign you should contact a professional.
If you’re unsure of how severe the scratch is, you might still want to consider a professional opinion.
That’s because their expert eye can accurately identify the severity and propose the best method to restore your car’s appearance to the pristine state.
Always remember, the approach towards repairing a car scratch greatly depends on its depth and severity. Determining which type of scratch you’re dealing with can give you a good indication of whether or not you need professional help.
Additionally, repairing a deep scratch may require spray painting and careful blending to match the car’s existing paint which is generally best left to the professionals.
Scratch repair may seem daunting at first, but with the right knowledge and tools in hand, even amateurs can tackle minor scratches with ease.

For those who aim to navigate minor scratch repair at home, the provided video link might be beneficial. This visual guide can help you understand the process and methods used for scratch removal.
Watch the video to see the methods in action and gain some useful hands-on knowledge on dealing with car scratches.
Choosing the Right Tools: What Are the Essential Tools Needed to Fix a Scratch?
Knowing what tools are exactly needed to repair a car scratch holds utmost importance. Identifying the appropriate tools not only ensures a flawless result but also helps prevent further damage to the car’s paintwork.
Tape and Body Compound
Preparation is key when repairing a car scratch and this begins with masking tape. Masking tape is essential as it assists in isolating the repair area, thereby eliminating the chances of accidental damage to the surrounding paintwork.
Next is the body compound, often confused with ordinary filler. Body compound works both as a gap filler and a mild abrasive to smoothen the scratched area, which helps in bringing a seamless finish. It is recommended to always go for quality products, even if they cost a bit more.
Quality body compound makes a significant difference in the outcome of the repair, aiding in achieving an undiscernable repair.
This is because high-grade compounds are richer in pigments and finer in texture, yielding a much finer finish compared to cheaper products that may contain larger particles.
Sanding Tools
Sanding is a crucial part of scratch repair and it requires a keen selection of tools. You’ll need both coarse-grit and fine-grit sandpaper. Coarse-grit sandpaper, such as 220-grit, is used initially to even the depth of the scratch in line with the surrounding surface.
Afterwards, fine-grit sandpaper, such as 1000-grit and 2000-grit, is utilized to subtly smoothen the repair area until it seamlessly blends with the rest of the surface.
The right selection and use of sandpaper ensures the repaired area blends well with the rest of the surface.
The proper application of sandpaper is key. The effective sanding process requires a gentle and even pressure to avoid creating new scratches or deepening the existing ones.
Additional Items
Besides the primary tools, certain additional items are required for the task. These include a microfiber cloth used for both cleaning the surface before repair and for final polishing.
Consequently, a good quality car wax is necessary to seal the repair, provide UV protection, and restore the car’s shine. Depending on the condition of the scratch, touch-up paint may also be needed.
A microfiber cloth, car wax, and touch-up paint are further essential items for scratch repair.
Without these items, the repair process is incomplete and the durability of the repair job is questionable. From cleaning before the repair to sealing the job, these items play important roles in all stages of the repair process.
In conclusion, choosing the right tools for scratch repair is critical not only for the immediate repair task but also for the long-term condition of the car’s paintwork. Knowledge about these tools, and using them properly, ensures a thorough repair that blends with the car’s existing finish.
Process of Cleaning the Scratch: Importance and How-To
When your car sustains a scratch, initial cleaning of the scratch is crucial.
This not only aids in accurate assessment of the damage, but also prepares the surface for subsequent stages of restoration.
If you overlook this crucial step, the residual dirt or grime may interfere with the repair process.
Why Cleaning is Vital
Countless microscopic particles of dirt and dust can embed themselves into the scratch, deteriorating the integrity of your car’s original paint over time.
Furthermore, the presence of these contaminants can negatively impact the adhesion of the repair materials, compromising the compatibility with the car’s paintwork.
Also, their presence distorts the true depth and size of the scratch, making it seem worse than it truly is.
So, prior cleansing of the area is a must for an accurate and efficient repair.
This will remove any foreign particles that may be present, ensuring a smooth and effective repair process.
Also, it prevents further damage to the surrounding paintwork during the repair process.
The Cleaning Methods
The first step in cleaning involves washing the scratch with soap and water.
It’s recommended to apply a commercial-grade car wash soap directly to the damaged area for an optimal result.
After lathering the soap on the area gently with a cloth, rinse it off with water.
This way, you can be assured that the surface has become properly clean, free of any superficial debris.
For stubborn grime or residues, it might be necessary to use a specialized car cleaner or clay bar.
Next, you need to dry off the area. One handy tip is to use a lint-free towel or microfiber cloth to prevent any cloth residues from remaining on the surface.
A good rule of thumb is to get everything as clean as possible before you start fixing the scratch.
As cleanliness equates to better end results, skilled auto professionals also suggest the usage of a car paint cleaner for a thorough cleaning regimen.
This would ensure a long-lasting, touch-up paint job.

By watching this video, you can better understand the difference between various types of car scratches and the process to deal with each one.
Moreover, it will give you valuable insights into how to effectively clean and prepare your vehicle’s scratches for a repair job.
This is Not a One-Size-Fits-All Process
Remember, depending on the type and severity of the scratch, you may need to employ different cleaning protocols.
The ideal cleaning method can vary based on the size, depth and location of the scratch.
So, always keep in mind; the cleaning is not a one-size-fits-all process.
You may have to tailor it to meet the unique requirements of each individual scratch.
This personalized approach ensures that, you are not causing further damage while attempting to clean it.
Using this cleaning guide as a standard procedure when you first notice a scratch on your vehicle, sustain the life and looks of your car.
After all, your car deserves to always look its best!
Understanding the Body Compound: Its Usage and Application Technique
When it comes to repairing car scratches, the body compound plays an integral role in your repair process.
This is a type of compound designed specifically for restoring and refinishing your car’s exterior surface.
Understanding the Purpose of a Body Compound
The main purpose of a body compound is to fill in the scratch or dent effectively, reestablishing the smooth surface of the car.
The unique formulation of a body compound allows it to adhere well to your car’s paint and metal, providing a firm base for the application of the paint.
Moreover, it is capable of withstanding outdoor weather conditions, ensuring that the repaired scratch does not deteriorate over time.
>Providing a firm base for the application of the paint, the body compound can withstand outdoor weather conditions, ensuring that the repaired scratch does not deteriorate over time.This ensures both the longevity and integrity of your vehicle’s finish, safeguarding the aesthetic and resale value of your car.
The Right Usage of a Body Compound
Before you start applying the body compound, it is crucial to thoroughly clean the scratched area and dry it completely.
The body compound should then be applied in a thin layer directly onto the scratch, using a plastic scraper or putty knife.
Ensure to spread the compound evenly across the scratch, filling it in completely and smoothing out any rough edges.
Wait for the compound to fully dry before proceeding with the next steps of the repair process.
>Spread the body compound evenly across the scratch, filling it in completely and smoothing out any rough edges. It is then crucial to wait for it to fully dry before proceeding.Correct usage of body compound is vital in ensuring a successful scratch repair, and avoiding a ‘bumpy’ or uneven car surface.
Some Key Points to Remember…
Always make sure to wear protective clothing, including gloves, when working with a body compound to avoid skin irritation or other potential health hazards.
Also, work in a well-ventilated area as the body compound can release strong fumes.
Lastly, remember to never rush the process. Allowing the body compound to dry properly before the next steps is crucial for the success of the repair.
Body compounds are indispensable in achieving a professional-looking car scratch repair. With careful application and patience, a scratch can become almost invisible, preserving your car’s lustrous finish.
How to Blend the Scratch: Sanding the Body Compound for a Seamless Finish
When it comes to fixing car scratches, the process does not end at simply applying the body compound to the affected area. As vital as it is, using the body compound is just one part of the bigger picture. Drawing a seamless finish from your DIY scratch repair largely depends on how well you blend the scratch by sanding the body compound.
Understanding the Sanding Process
Your car scratch repair work’s success rides on the efficacy of the sanding job you perform post the application of the body compound. You must understand that sanding is not just about rubbing the sandpaper against the body compound. It involves a methodical approach that demands patience and precision in equal measures.
Selecting the Right Sandpaper
As simple as it may sound, the choice of sandpaper plays a pivotal role in achieving the sought-after finish. This is particularly true when sanding over a body compound. A finer grit sandpaper, usually over 2000 grit, works best for this purpose. The finer grains of the sandpaper gently smooth out the body compound without causing any new scratches.
The Technique to Sand
The correct sanding technique can be the difference between a professional looking repair or an obvious patchwork. It is recommended to start with light, slow strokes. While sanding, ensure the area remains wet to discourage the formation of any further scratches. Also, the movement should be in the same direction to give a homogenous finish.
It is recommended to start with light, slow strokes. While sanding, ensure the area remains wet to discourage the formation of any further scratches.
After said quote, let’s reiterate. This is of great importance because if sanding is done too heavily or quickly, it may lead to uneven surfaces or even new scratches. Furthermore, keeping the surface wet provides lubrication that prevents unwanted abrasion on the car’s surface.

Gain a more in-depth understanding of the process by watching this tutorial. This visual aid might offer step by step demonstration and practical tips to effectively sand a body compound.
Achieving a Seamless Blend
Getting an even surface by the end of your sanding job is good, but the real goal is to achieve a seamless blend that makes it challenging to distinguish the repaired area from the rest of the car’s body. This can be ensured by gradually reducing the pressure while sanding and using more delicate grit towards the end.
The final touch when you’re wrapping up the sanding process is to clean the repaired area with a soft cloth. This will remove any dust particles and provide you with a clean surface to move on to the next step of your car repair: waxing.
Why Waxing is Essential: Understanding Car Wax and Its Application
Let’s delve into the crux of the matter – why is waxing essential for your car?
A significant part of waxing’s importance lies in its ability to provide a protective barrier to your vehicle’s paint.
Understanding Car Wax
Car wax, typically, is a blend of waxes, oils, and solvents which may include crude oil distillates, ethanol, mineral spirits, and more.
This unique composition lends itself to forming a protective layer to the surface of your car.
Unlike the common misconception, car wax does not blend with your car’s paint.
Instead, it sticks to the paint, providing a line of defense against external elements.
Perhaps the most beneficial attribute of car wax is its capacity to serve as the first line of defense against minor scratches or scrapes.
Car wax, with its unique composition, plays a vital role in maintaining the gloss and shine of your vehicle.
Supporting this statement, car wax indeed helps to <--Maintain the shine-->, aesthetics, and overall appeal of your car’s exterior.
Furthermore, by filling up any diminutive scratches or surface imperfections, car wax aids in providing a smooth, glossy finish to your car.
Application of Car Wax
Understanding how to correctly apply car wax is just as essential, if not more, than understanding the importance of car wax.
The application of car wax requires attention to detail and a methodical approach to achieve the best results.
In general, the car wax should be applied using a soft cloth or applicator pad, maintaining a steady, circular motion.
It is crucial to ensure that thin, even layers of wax are applied across the surface to prevent any streaking or uneven gloss.
Moreover, car wax is not instantaneous in its results; it typically requires a certain amount of time to dry and adhere to the car’s surface appropriately.
The correct application of car wax can significantly enhance your car’s aesthetics and protect it from minor scratches and exterior damage.
This underlines the essence of car waxing as a necessary aspect of thorough car care.
Beyond just minor scratches, waxing can help in mitigating damage from debris, bird droppings, and even harmful UV rays.
With its multifaceted benefits, the process of car waxing hence plays a fundamental role in car scratch repair.
What to Avoid: Common Mistakes While Repairing Car Scratches
When it comes to repairing car scratches, adequate knowledge and good practices are crucial.
Mistakes during the process could lead to unsatisfactory results or even further damage to your car’s paintwork.
Overlooking the Importance of Proper Cleaning
The first common mistake is to underestimate the importance of proper cleaning before getting started.
Dirt, grease, or other contaminants trapped under the surface can interfere with the effectiveness of the repair materials and lead to an uneven or blotchy finish.
Therefore, it is indeed crucial to clean the scratched area thoroughly, using soapy water or a specialized car cleaning solution.
Dirt, grease, or other contaminants trapped under the surface can interfere with the effectiveness of the repair materials and lead to an uneven or blotchy finish.
This prevents any unwanted particles from getting mixed into the repair materials, ensuring a smoother and more effective application process.
Moreover, this also provides a cleaner surface which enables you to better assess the scratch and determine the appropriate repair method.
Improper Use of the Body Compound
The second common mistake is the improper use of body compound.
These compounds are meant to fill in the scratch and level it with the surrounding paintwork, but using too much or too little can create other issues.
Using too much can create a hump that needs to be sanded down, while using too little may not fully fill the scratch, requiring additional applications and delaying the repair process.
Using too much body compound can create a hump that needs to be sanded down, while using too little may not fully fill the scratch.
Thus, it’s critical to apply the body compound carefully and evenly, ensuring that the scratch is completely filled but without going overboard.
It’s always better to start with less and add more if necessary, and to ensure that the compound is spread evenly.
Skipping the Finishing Touches
Lastly, another common mistake is skipping the finishing touches such as sanding, polishing, and waxing.
These steps are extremely important for blending the repaired area with the surrounding paintwork and providing a protective coating to prevent future scratches.
Finishing touches such as sanding, polishing, and waxing are extremely important for blending the repaired area with the surrounding paintwork and providing a protective coating to prevent future scratches.
In the provided video, you will gain a visual understanding of how the repair process should look, including how to properly apply the body compound and finish the repair.
Utilizing this knowledge will help avoid these common mistakes and hopefully lead to a successful scratch repair for your car.
Maintaining Your Car’s Paintwork: Tips to Prevent Future Scratches
As part of your vehicle’s overall maintenance, preserving the finish of your car’s paintwork is important not just for aesthetic reasons but also for the longevity of the vehicle.
Overtime, scratches may occur due to various reasons which include elements from the external environment or even human error, but maintaining routine practices can minimize such damage and ensure your car’s look remains intact for longer.
Washing Your Car Regularly
Ensuring to wash your car on a regular basis is one of the significant ways towards maintaining a scratch-free exterior.
Accumulation of dirt, grime and pollutants can cause microscopic scratches which, if not removed timely, can lead to more visible and significant damage over time.
Preferably, using a high-pressure water sprayer and a gentle car shampoo can help eliminate harsh pollutants without causing unwanted scratches.
You should also always remember to use a soft microfiber cloth or a specialized car wash mitt for the process.
Indeed, a regular and meticulous washing schedule can go a long way in preventing the onset of scratches on your vehicle.
This may seem like a simple routine, but it essentially kicks off the grit that may cause scratches when they rub against your car paint.
In turn, this prevents the scratches from becoming more profound or multiple.
Regular Waxing
Another effective way of maintaining your car’s paintwork and preventing scratches is through regular waxing.
A good quality car wax not only brings a glossy shine to your vehicle but also forms a protective layer which guards your car against scratches.
The wax essentially fills in the small scratches and forms a slippery surface which reduces friction between debris and your car’s paint, thereby helping in preventing future scratches.
Moreover, it also offers protection against harmful UV rays which can cause your car paint to fade over time.
In sum, the two-fold benefit of waxing your car not only maintains the attractiveness of your car but also significantly contributes towards keeping it scratch-free.
Thereby, it is advisable to get your car waxed at least twice a year.
If your car is newer or garaged most of the time, you can choose to wax it annually.
Avoiding Parking Next to Cars and Clear Objects
Avoiding scratches isn’t only about how you handle your car but also about where you choose to park it.
It is advisable to avoid parking next to cars that are parked haphazardly as their doors could open and ding your car causing unwanted scratches.
Equally, avoid parking next to carts or close to fences as they can also result in scratches or scuffs on your car.
Indeed, where you choose to park your car plays a significant role in maintaining the perfect finish of your car.
This tip may come off as intuitive, yet it is one of the most neglected aspects.
Being mindful of your car’s surroundings can go a long way in enhancing its life and maintaining its look.
Overall, maintaining your car’s paintwork requires conscious efforts and these tips can collectively prevent future scratches. Ultimately, it all boils down to how much care and attention you provide your vehicle, to keep it in its best state possible.The Bottom Line
Ultimately, fully comprehending the various types of car scratches and their causes is the first step to repairing any damage.
Accurately identifying and analyzing the depth and severity of these scratches will then determine whether or not professional help is necessary.
Essential repair tools and processes, including effective use of body compounds and thorough cleaning methods, play a significant role in successful scratch repair.
Blending techniques and the application of car wax are equally vital for achieving a seamless finish.
However, being cautious of common errors in these procedures is important for avoiding any further damage.
Taking preventative measures and proper maintenance significantly lessen the risk of future damage to your car’s paintwork.
Thus, equipped with this knowledge, you can keep your car looking as good as new for longer.